Showing posts with label craft. Show all posts

Thursday, 8 October 2015

Nature Walk Crafts


Hands up who loves Autumn??
ME!!
I love the colours of the leaves, the crisp air, the due drops on the spider weds and the beautiful jewels that mothers natures brings with her in Autumn.
We collect conkers, acorns, leaves and pine cones when ever we get a chance. The kids love searching for the biggest ones and we really enjoyed making things with our latest finds.


This is just one example of what you can do with Nature walk/scavenger hunt finds. If your looking for something to help the creative juices going on your walks check out me FREE Autumn scavenger hunt printable {here}


We made these little guys using some of what we found. Acorns, chestnuts and matches. You could use toothpicks if you don't have matches. I used a metal skewer to make the holes first to make it easier for the match sticks to go in. Then we drew the faces on with a sharpie. We had hours of fun making all kinds of things. 


Now, go get your wellies on and get outside with your little ones and start collecting.
Adventure awaits!

Wednesday, 16 September 2015

Popsicle Stick Scarecrow {Autumn craft}


Happy Hump Day Friends!
I've got another quick and easy craft here for you today. I love working with popsicle sticks. They're so easy to use. Not too fiddly for little ones either. We've made a Christmas Crib {here} using them too. But today we're working on an autumn scarecrow.


You will need:
cardboard
8 fat popsicle sticks
glue
jewels
coloured paper
paint
scissors


Cut a piece of card a little shorter than your sticks.
Glue 7 of the sticks onto the card.
Cut stripes of the coloured paper to look like hair.
Glue this to the ends of the last stick.
Take the last stick and glue it on top of the other at an angle to look like a hat.
Paint your hat brown or whatever colour your little heart desires.
Cut out the eyes and nose and glue them down.
Cut out a flower shape and glue in place with a coloured jewel.
Draw on a big smile and your done.

You can out these on a book shelf or a window sill but I'm going to stick some magnets to the back of mine and put the on the fridge.


Wednesday, 9 September 2015

Tissue Paper Trees {autumn craft}


Hello Friends!!
Hope your all enjoying this lovely Autumn weather. I'm certainly enjoying the crisp, fresh air the this time of year brings. I've got another quick and simple craft to keep you little ones busy on the evenings. Have you noticed that the evenings are getting shorter??

We love the Autumn colours and what better why to show them off then with a lovely autumn tree. 


You will need: 
Glue
Coloured Tissue
Drawing paper
Crafty kid

Draw the outline of a tree on an A4 page.
Get your child to tear up the tissue paper. This was the favourite part for my little man. 
Then start gluing the pieces to the paper.
It's that simple.


Crafts don't have to be complicated to be fun and if your kids are having fun, that's the most important thing. Right??


Monday, 31 August 2015

Felt Pinwheel Hairband {tutorial}


If you have girls in your house and they're anything like my girl, then they love their hair accessories. Hair bands are very popular in our house as my daughter only has one hand and she can do her own hair with these. She loves trying different one and I just happen to love making them for her.


This one is so easy to make and you don't even need to be good at sewing to do it.

You will need: 
Felt
Needle
Thread
Glue gun
Beads
Hairband

Start with two squares of felt. One smaller than the other. The colours are up to you. 
Lay them down on top of each other and push the needle through the center of the square from the back.
Take the needle and bring the thread over the middle of one side of the square and push the needle back through the center pulling tight. Repeat this on all 4 sides.
When you have all the sides pulled in, take you beads of choice and sew them onto the top of the pinwheel. Tie off the thread at the back of the felt.
To attach to the hairband, cut a circle of felt (about the size of a €2 coin).
Place your pinwheel on the hairband where you want it and hot glue it to. 
Add the circle to the underside of where you glued the pinwheel and glue it down.

You're done!! 


She has been wearing this everyday since I made it. 
I hope you enjoy making these as much as I do. Show me your creations over on my Facebook page. I'd love to see what you make for your little ones.

Thursday, 20 August 2015

The BEST Homemade Play Dough Recipe


I have the best, no cook play dough recipe ever.
It's so easy to make. No messing with pots and burning play dough.
It's soft, smooth and you can make it in whatever colours and flavour your little heart desires.


1 cup of flour
1/2 cup of salt
1 tbs of cream of tartar
1 tbs of oil
Food colouring
Food spices/flavouring
1 cup of boiling water

Directions

Mix all ingredients except the boiling water together in a large mixing bowl.
Add the boiling water and mix well.
Add the food colouring to the water.
{The food colouring will mix in better if added to the boiling water.}
 Please take care when using boiling water around children.
Stir well until the mixture is well combined.
Turn out on the counter and knead it gently.

If it too wet... add more flour
If it's too dry... add more oil.

It's that simple!!

I hope your kids have as much fun as my two had. Were going on 5 hours of entertainment with this stuff and this mom isn't complaining.

Monday, 20 October 2014

Autumn Paper Plate Wreath


I promised you all a quick and easy craft today and here it is.
{A little later than I hoped}

"Autumn Paper Plate Wreath"


This was so fun to do. We had so much fun collecting all the pretty leaves. Trying to find as many colours as possible and learning all about autumn and what happens in the season. I love how you can make an everyday thing into a learning experience for kids.

We had planed to do this with the leaves that we collected but it just wouldn't work for us. I think our leaves might have been too dry. We decided to use some colourful tissue paper ( Tesco for €3) instead and the kids were much happier. Happy kids = Happy Mom.

All you need is:
Leaves/ Tissue paper
Paper plates
Glue 
String


Cut the center of the plate out so it looks like a wreath.
Attach the string to the wreath.
Let your kid go crazy with the glue and stick the leaves/tissue paper onto the wreath.
Let it dry and your done.
Hang you kids awesome wreath on the door or window and admire nature indoors.

Make sure to click the link below for more beautiful paper plate wreaths.

Click here

Make sure to keep the middle of the paper plate. I'll have another craft later in the week that you'll need it for. 

FACEBOOK : PINTEREST : TWITTER : INSTAGRAM : BLOGLOVIN

Thursday, 12 June 2014

{craft} Fathers Day Trophies


I've gone a little Dad crazy this week with the posts but I promise this is the last one.
This is a little craft that we did last year for the hubs, my dad and the godfathers.
They absolutely loved them and my Dad has his sitting on a shelf all year round.


(sorry for the phone pictures. Last minute job this morning. bad blogger)

All you need:
Cardboard
Glue
Pasta
Gold/Silver spray paint
Glitter
Jewels
Broken Jewelry

Just cut out the shape of your trophy and spray it gold.
Simple glue all the paste shapes onto the card with PVA glue.
Stick jewels and sprinkle glitter.
There's no rules to what you can out in them, this is just what we did.
They can take a bit of time to dry so make it a few days in advance.

Present it to Dad and tell him he's you number 1.

Simple as that.
I hope you've enjoyed the Father's Day posts as much as I have this week.

Now, I'm heading to the park to get some much needed vit. D.
Hello Mr. Sunshine.
You have been missed.
Thanks for stopping by.


Monday, 4 February 2013

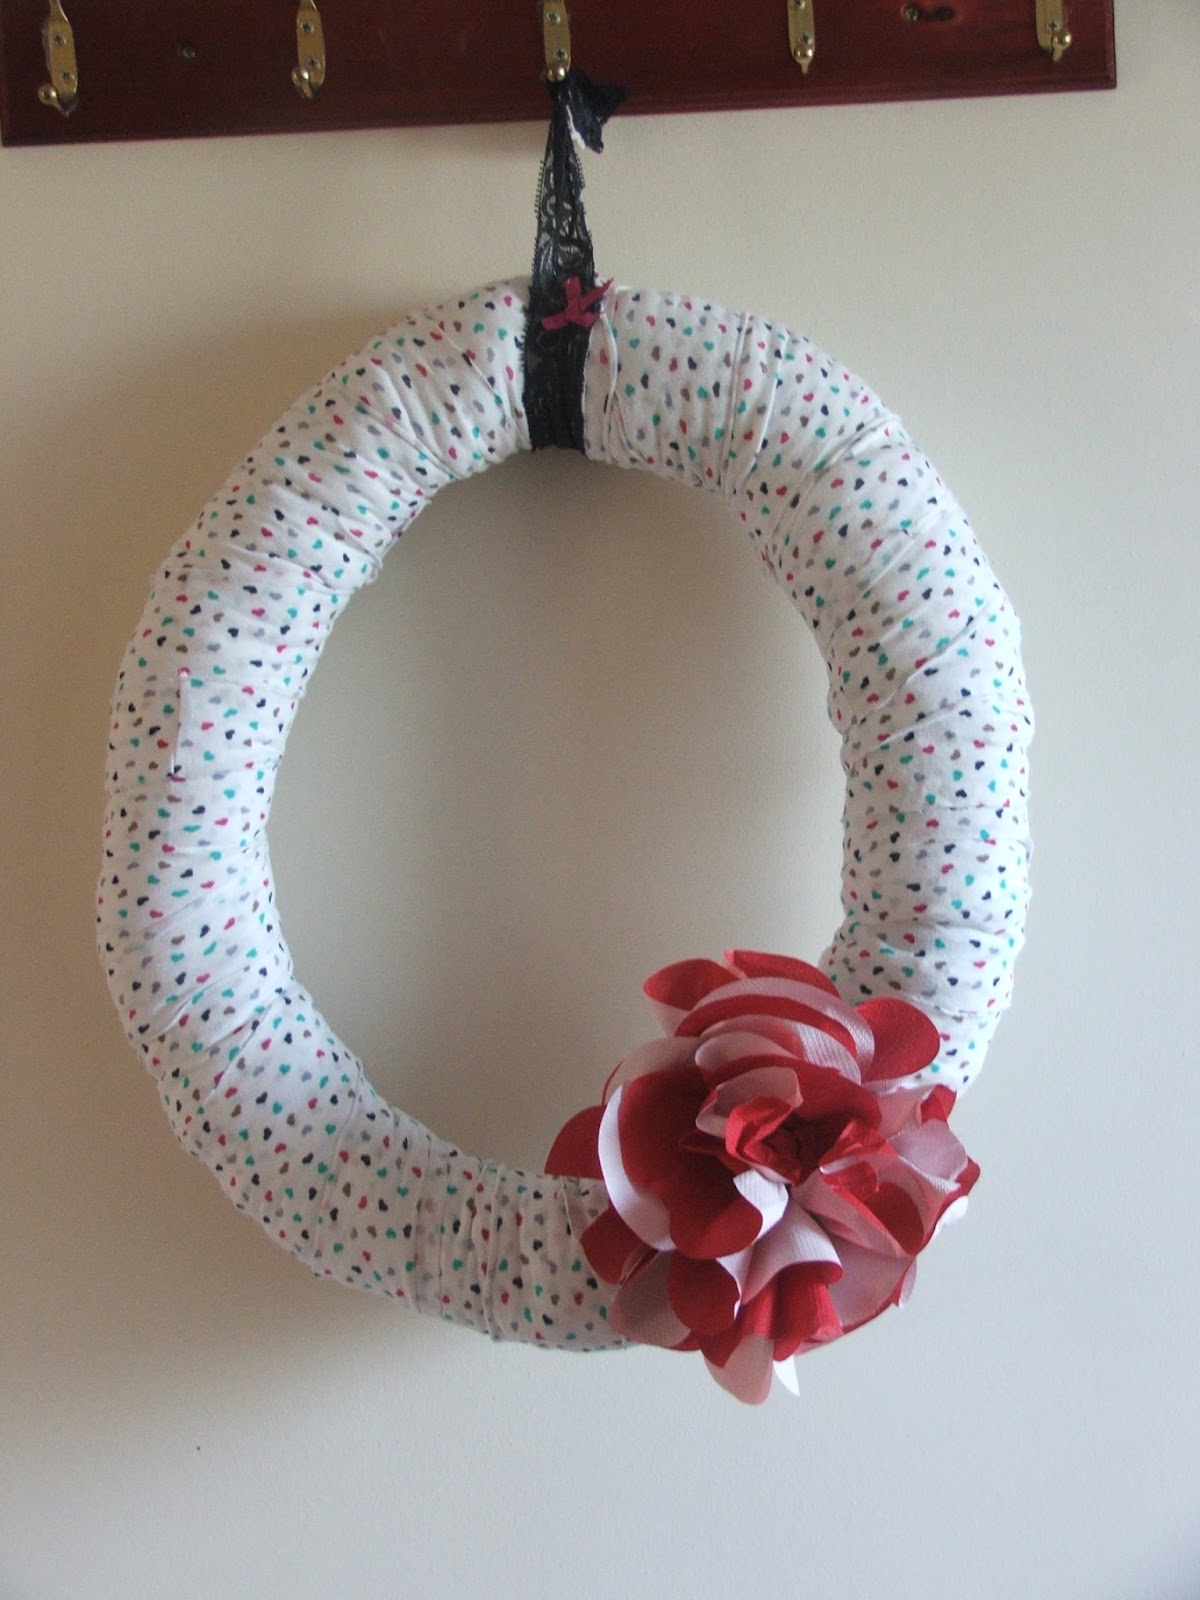
Valentines entry table and wreath


Valentines is on the way and as usual I'm decorating for the occasion.
I don't go too mad for Valentines. Just a few bits here and there.

I'm linking up with AP over at ILYMTC for two amazing link-ups she has going at the moment.

The dog days {of winter} are over and  Hey, That's Pin-Tastic!


i love you more than carrots


I had most of this stuff lying around the house.


I made the wreath the normal way. Only thing different is I wrapped it it bubble wrap first to make it fat. Then to make the flower I used heart shaped napkins to make the flower and pinned it on.


You can't have Valentines with out having roses.


If your looking for a Valentines printable you can find this one on my printables board on my Pinterest page.


I have loved the link-up series and finding new blogs to follow. I just need 10 more hours in the day to go read and check out all the amaze-balls projects that were featured.

Love in in the air people, Embrace it!!


Monday, 14 January 2013

Twistable organisation caddy


Every January I get this crazy need to organise my life. There is just something nice about starting a new year with a shiny new and organised house.

One of the biggest problems is trying to keep it organised. 

My daughter has enough twistables and colouring pencils for 10 kids but I guess you never have enough reds, or so she tells me.

I have put then in pencil cases, small bins, shoe boxes, every kind of a container but they always end up spilled out because she couldn't find the one she wanted.

That is how I ended up making this beauty. So simple but so effective.


All I needed was:
A shoe box
Wrapping paper
Toilet roll tubes
Double sided tape

I covered the box to make it look nice. My thinking was, if it looks nice she might use it more
I just stuck the tubes into the box with the tape.
And filled her up.

She loved it! She said it made her table look like an office. She's funny.

Any who, I'm hoping that this will finally keep this little corner of my house organised.

I'm lining up today as part of the “Dog Days (of Winter) Are Over”  link-up series.

I'm linking up with AP twice today so head on over to I love you more than carrots and check out some more of the amaze-balls projects these women have been tackling.

Happy Monday Everyone!!


New Years Eve jar : Hey, That's Pin-tastic!


i love you more than carrots


It's Monday again which could only mean another round of Hey, That's Pin-tastic! over at


I have seen these jars all over pinterest and some Mom blogs so I decided to jump on the band wagon and do one too.


It is very easy to get stuck in a rut and only remember the bad things that happened in the past year. It's not so easy to remember to good, funny or even goofy things that happened.

So that is why I'm doing it. So on New Years Eve I can sit down with the hubs and look back on how awesome our year was.

So all you need is:
A Jar
Paper 
Pin
Ribbon
Card.
Fun memories

Decorate the jar what ever way you want.
I just tied a ribbon around the top with a label.

I'm going to post a picture of the jar on December 31 to show you all how good our year was.

Have fun filling it up.


Sunday, 23 December 2012

Reindeer food.


I made these for the neighbors kids when I was giving out Christmas cards. They loved it and it didn't cost anything to make. I had everything at home. But the effect it had was priceless.
This what you'll need.
 We were going to do it in baby food jars but decided zip lock bags would be nicer and we could put a pretty label on it too.

 Fill your bags up with half porridge oats and half bird seed and add glitter and confetti.
Close the bag and tape it down.
Add a piece of card and staple it on to the bag.
Add you verse below and a ribbon and your done.


Sprinkle on the lawn at night

The moon will make it sparkle bright

As Santa’s reindeer fly and roam

This will help guide them to your home!


Merry Christmas everyone!


Friday, 21 December 2012

DIY Snow Globe


This is the simplest but most amazing thing I have ever made. I made these last year with Jasmin for her Nana and she loved it.

School holidays mean a gift for the Teacher. I didn't wanna get flowers or chocolates cos I'm pretty sure she would have loads of them. So we went with the Snow globe.

All you need is :
A jar (I used an Tesco apple sauce jar. It seems to be a good size)
Ornament
Glitter and small table confetti
Water
Glycerine
Ribbon to decorate.


Glue your ornament to the lid of the jar. Let it dry.
Put in the glitter and confetti. The course glitter is better if you have it.
Add the water and a few drops of glycerine. This makes the glitter float more.
Screw on your lid and check it's not leaking.
Add a ribbon or bow and your done!


Suprise some with a home made gift from the kiddos this year. They'll love it. I promise!

Only 4 more sleeps!!


Wednesday, 19 December 2012

Eve's pudding {Recipe}


Today I'm sharing one of my favourite dessert recipes with you. It is the yummiest and easiest dessert you will ever make.

 Now it is not very good for your waste line if you have it every week but for special occasions you can't go wrong with this little beauty. It's the dish I carry to all the parties and I never have any left over.

Ingredients
4 cooking apples
sugar
100g butter
100g sugar
150g flour
2 eggs

Peel and slice you apples and sprinkle them with sugar. I never measure this sugar. I just put enough to coat the apples and make them sweet.
Next, cream your sugar and butter until pale and creamy. Add your flour and eggs bit by bit unitl all combined. Add a drop of milk if the mixture is dry.
Spread the mixture over the apples and sprinkle more sugar over the top. This will give a nice crunch to the top when it's cooked.
Cook at 180c for 40 minutes.
Serve warm with cream or custard. Or whatever why you like it.
Trust me when I say this will go fast so get in there first for your helping.

I'll be making this for Christmas day. I can't wait.

Happy Eating!!

Related Posts Plugin for WordPress, Blogger...